步驟#
關閉執行中的 WSL#
首先先關閉所有 WSL 視窗,然後選擇cmd或powershell執行以下指令徹底關閉 WSL:
1wsl --shutdown
建立新的存放空間#
成功關閉後,創建並進入新的存放位置:
1# 假設我將資料夾建立在 D:/WSL2
2mkdir D:/WSL2
3cd D:/WSL2
查詢當前 distribution 名稱及狀態:#
透過以下指令查看現有的distribution:
1wsl -l -v
2# 或者
3# wsl --list --verbose
接著應該會看到顯示類似以下內容:
1  NAME      STATE           VERSION
2* Ubuntu    Stopped         2
匯出#
記住NAME及確定STATE是Stopped後,就可以匯出整個系統空間了:
1wsl --export <NAME> <OUTPUT_FILE>.tar
2# 將 <NAME> 改成剛剛查詢到的 NAME;
3# <OUTPUT_FILE> 則改為輸出的檔案。
4# 例如:
5# wsl --export Ubuntu ./ubuntu.tar
(可選)刪除舊空間#
匯出完畢後可以選擇刪除舊的儲存空間(如果新的命名不重複也可以不刪):
1wsl --unregister Ubuntu
匯入#
匯入空間到新環境:
1wsl --import <NAME> <PATH> <INPUT_FILE>
2# 將 <NAME> 改為新的名稱,如與舊的相同,記得先執行上一步的「unregister」;
3# <PATH> 改為空間新存放的位置,例如先前已經移動到目錄,則直接設為「./」;
4# <INPUT_FILE> 則是剛剛匯出檔案的位置及檔名,例如「./ubuntu.tar」。
5# 例如:
6# wsl --import Ubuntu2 ./ ./ubuntu.tar
匯入完畢後基本上就大功告成了,而那個匯出的.tar檔案確認無誤後便可以刪除。
可能需要注意的幾個小問題#
終端記得更新為新的 distribution#
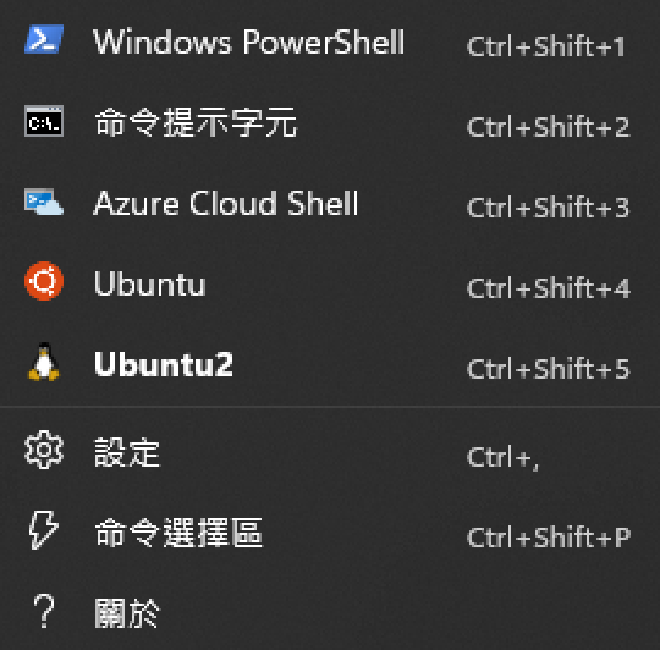
如果是使用如「Windows Terminal」之類的終端外殼,則記得更改啟動項:
p.s. 如果找不到新的 distribution,則可能重開後在設定中尋找。
登入終端後並非欲設使用者,而是 root 身分#
稱入後如果看到如下訊息:
This message is shown once a day. To disable it please create the /root/.hushlogin file.
則請按照提示在該目錄創建檔案:
1touch /root/.hushlogin
然後編輯設定檔/etc/wsl.conf,添加如下資訊(將alpaca改為您的欲設用戶名):
[user]
default=alpaca
p.s. 上面設定的用戶名必須是存在的用戶,若不存在請自行創建。
儲存後,關閉使用到該 distribution 的 WSL 視窗
1wsl --terminate <NAME>
2# 將 <NAME> 改為 distribution 的名稱,如「Ubuntu2」:
3# wsl --terminate Ubuntu2
重開後應該就能自動以預設使用者身分登入,到此也就完成vhdx的移動了。
References#
- 《how to move the vhdx of wsl2 to other disk · Issue #412 · MicrosoftDocs/WSL》https://github.com/MicrosoftDocs/WSL/issues/412
- 《windows subsystem for linux - Where are the files inside wsl2 physically stored? - Stack Overflow》https://stackoverflow.com/questions/64185560/
- 《linux - How to set default user for manually installed WSL distro? - Super User》https://superuser.com/questions/1566022/